Complete Your Profile
SF
Scolingo Founder
May 8, 2026
Everything you need to finalize your profile and prepare for receiving your first bookings.
Once you are accepted, your next step is to fully complete and review your public profile. Make sure your availability is set correctly, understand how the booking flow works, and familiarize yourself with the basic payment process before going live.
Edit Profile
Once you enter the Teacher Dashboard you will be able to see your full name in the bottom left corner. Click on it and then click on “My Teacher Profile.”
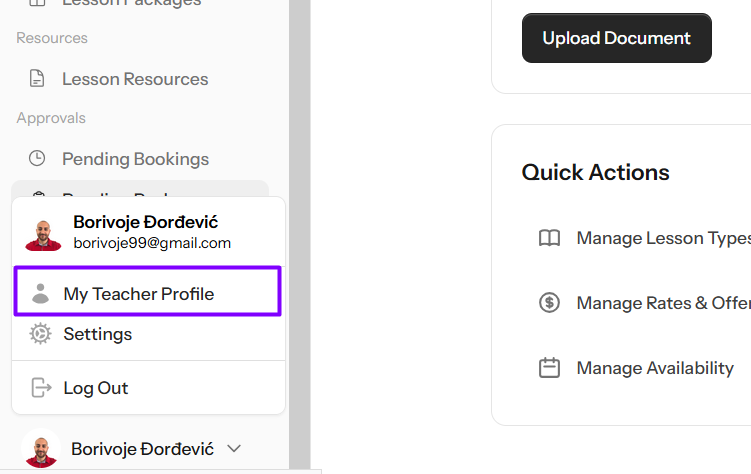
Click on “Edit Profile.”
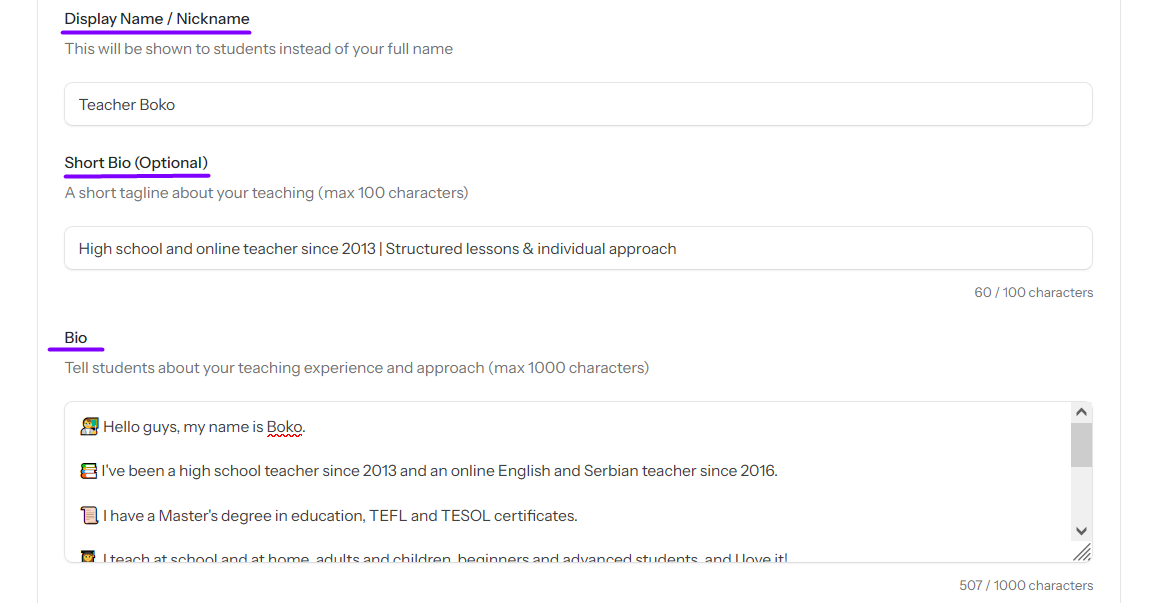
• Display Name & Profile Picture
The first step is to upload a profile picture. Detailed guidelines are available in the previous Teacher Corner Post: “Profile Display Name and Picture Guidelines.” Follow those instructions carefully to choose a professional photo and an appropriate display name.
• Short Bio (Optional)
Write one sentence that best describes you as a teacher. Maximum 100 characters – keep it clear and concise.
• Bio
Write about yourself, including your educational background, teaching experience, qualifications, and teaching approach (maximum 1000 characters). Keep it professional, clear, and focused on what students can expect from your lessons.
• Introduction Video (YouTube)
Paste a YouTube video URL or embed code to display your introduction video on your profile. Direct video file uploads are not supported. Please upload your video to a platform such as YouTube and paste the link here.
If using YouTube, ensure the video is set to “Unlisted” or “Public,” not “Private.”
If using YouTube, ensure the video is set to “Unlisted” or “Public,” not “Private.”
• Video Call Link
Paste your personal link used for all lessons (Google Meet, Zoom, Microsoft Teams, etc.).
You can use whichever platform you like.
Students will see a "Join the lesson here" button on their booking page.
You can use whichever platform you like.
Students will see a "Join the lesson here" button on their booking page.
• Timezone
Your timezone is detected automatically by the platform. Simply take a look and verify that it is correct – no changes are usually required.
• Save Changes
After editing your profile, make sure to click “Save Changes.”
Teaching Languages
You can choose which approved teaching languages you want to enable or disable.
You can also apply to teach a new language below. Simply select the language and upload a relevant certificate confirming your proficiency.
You can also apply to teach a new language below. Simply select the language and upload a relevant certificate confirming your proficiency.
My Certificates & Diplomas
You can upload additional diplomas and language certificates here.
All documents are reviewed by our team before being approved and displayed on your public profile.
All documents are reviewed by our team before being approved and displayed on your public profile.
Manage Lesson Types
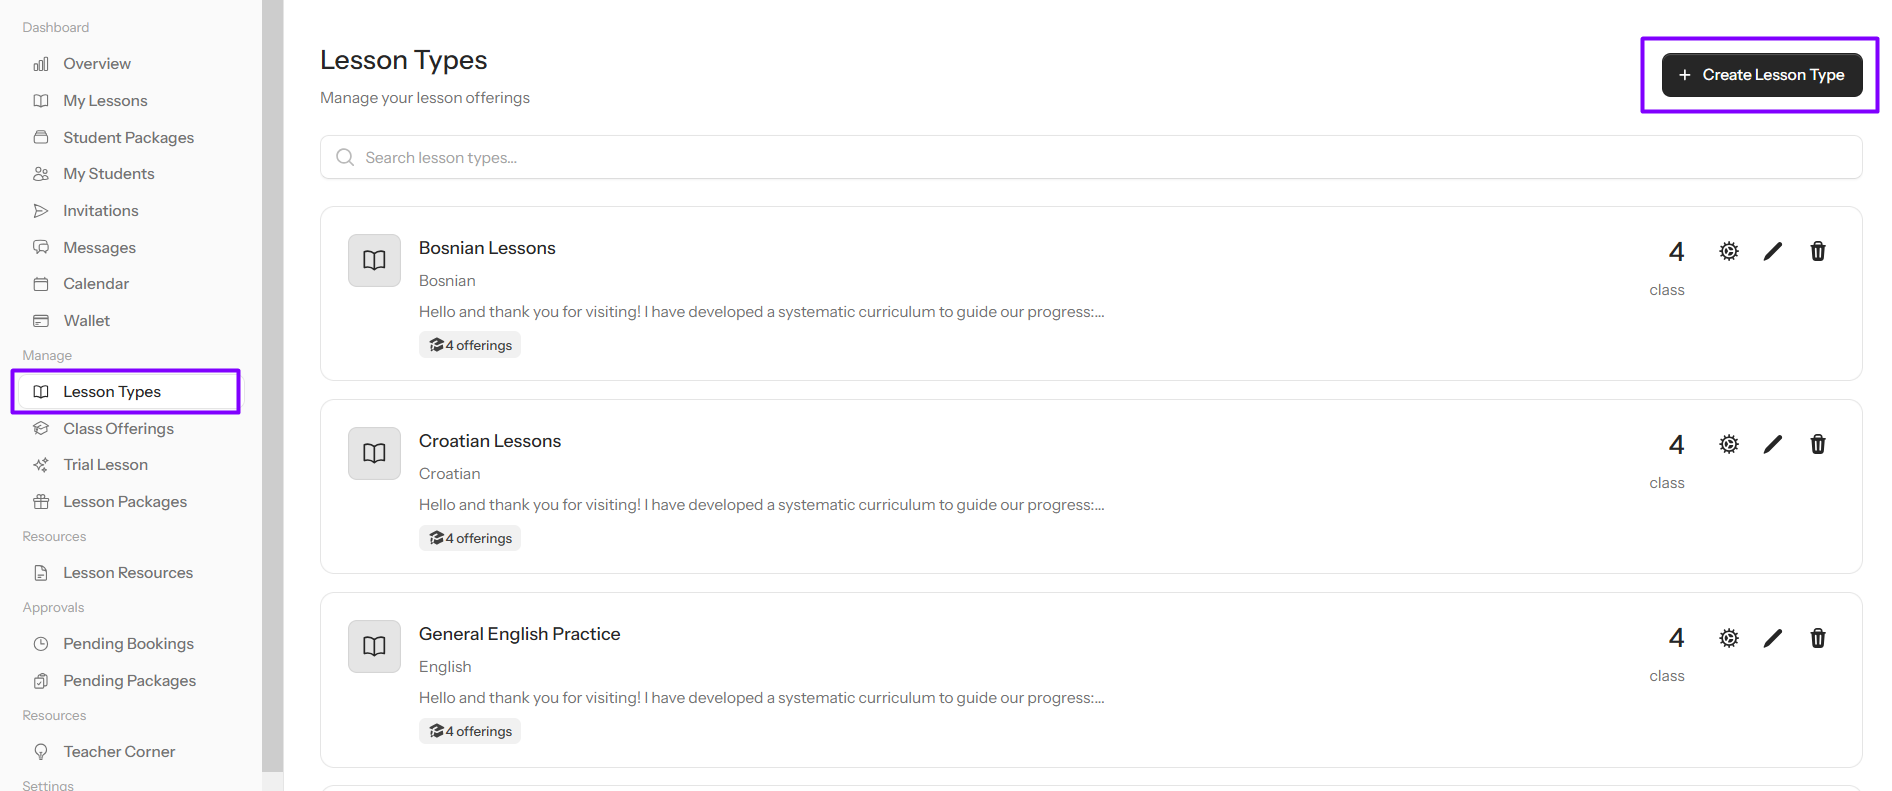
Next, go all the way down to “Quick Actions” and select “Manage Lesson Types.” Create one or more lesson types for each language you teach (e.g., “Grammar Lesson,” “General Conversation,” “Beginner Lessons”). You can also access this section from the left-side main menu under “Lesson Types.”
Manage Rates & Offerings
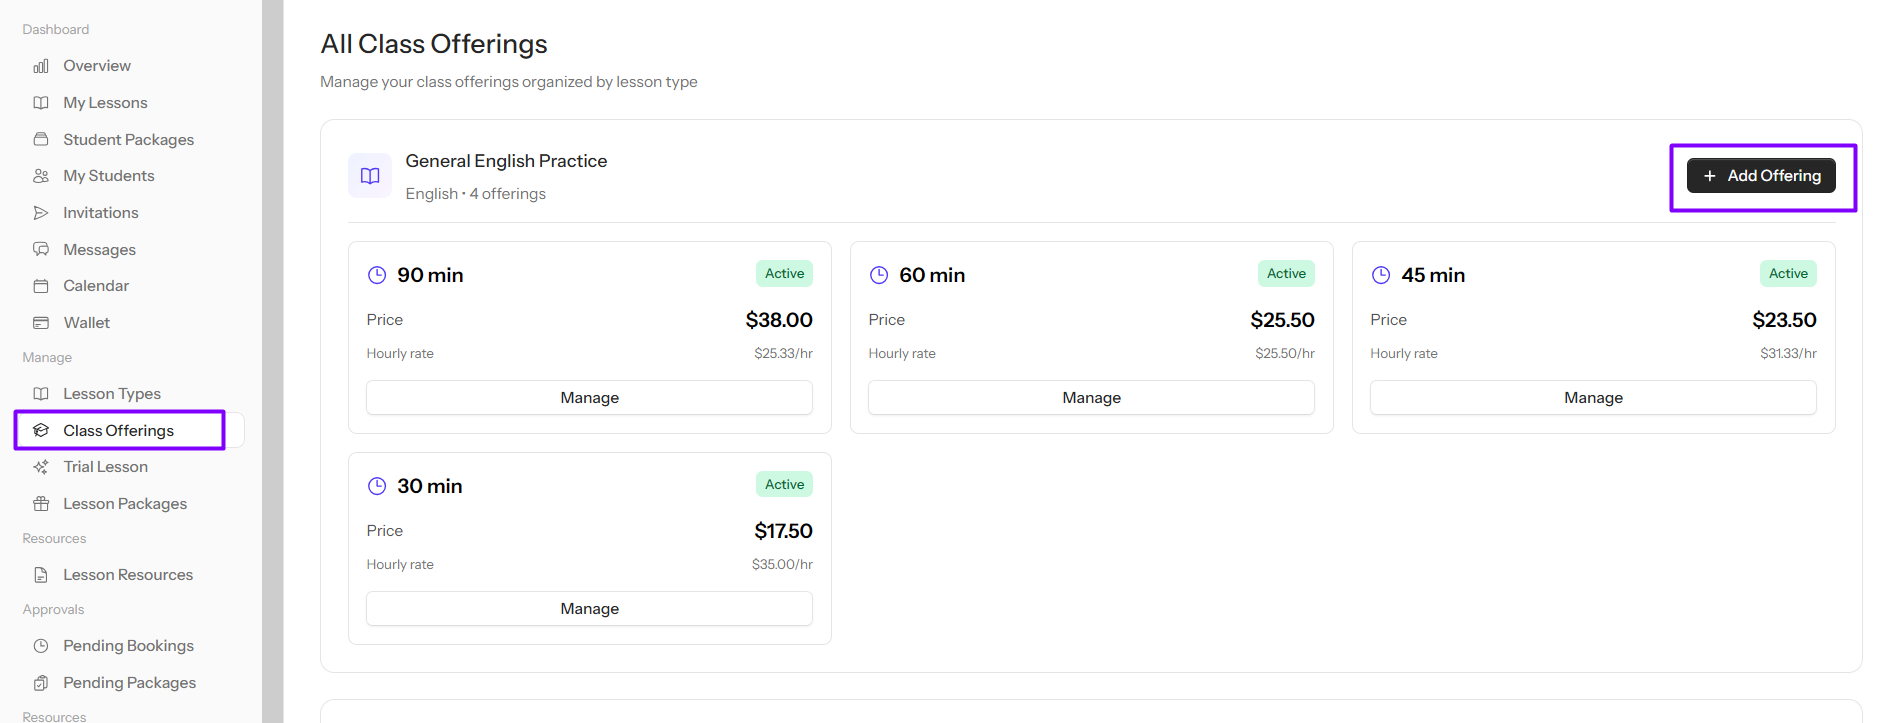
Then open “Class Offerings” from the main menu or “Manage Rates & Offerings” in “Quick Actions” in “My Teacher Profile.” Here, you can set different lesson durations and prices for each lesson type you’ve created.
Manage Availability
You can access this option under “Calendar” in the main menu or through “Quick Actions.”
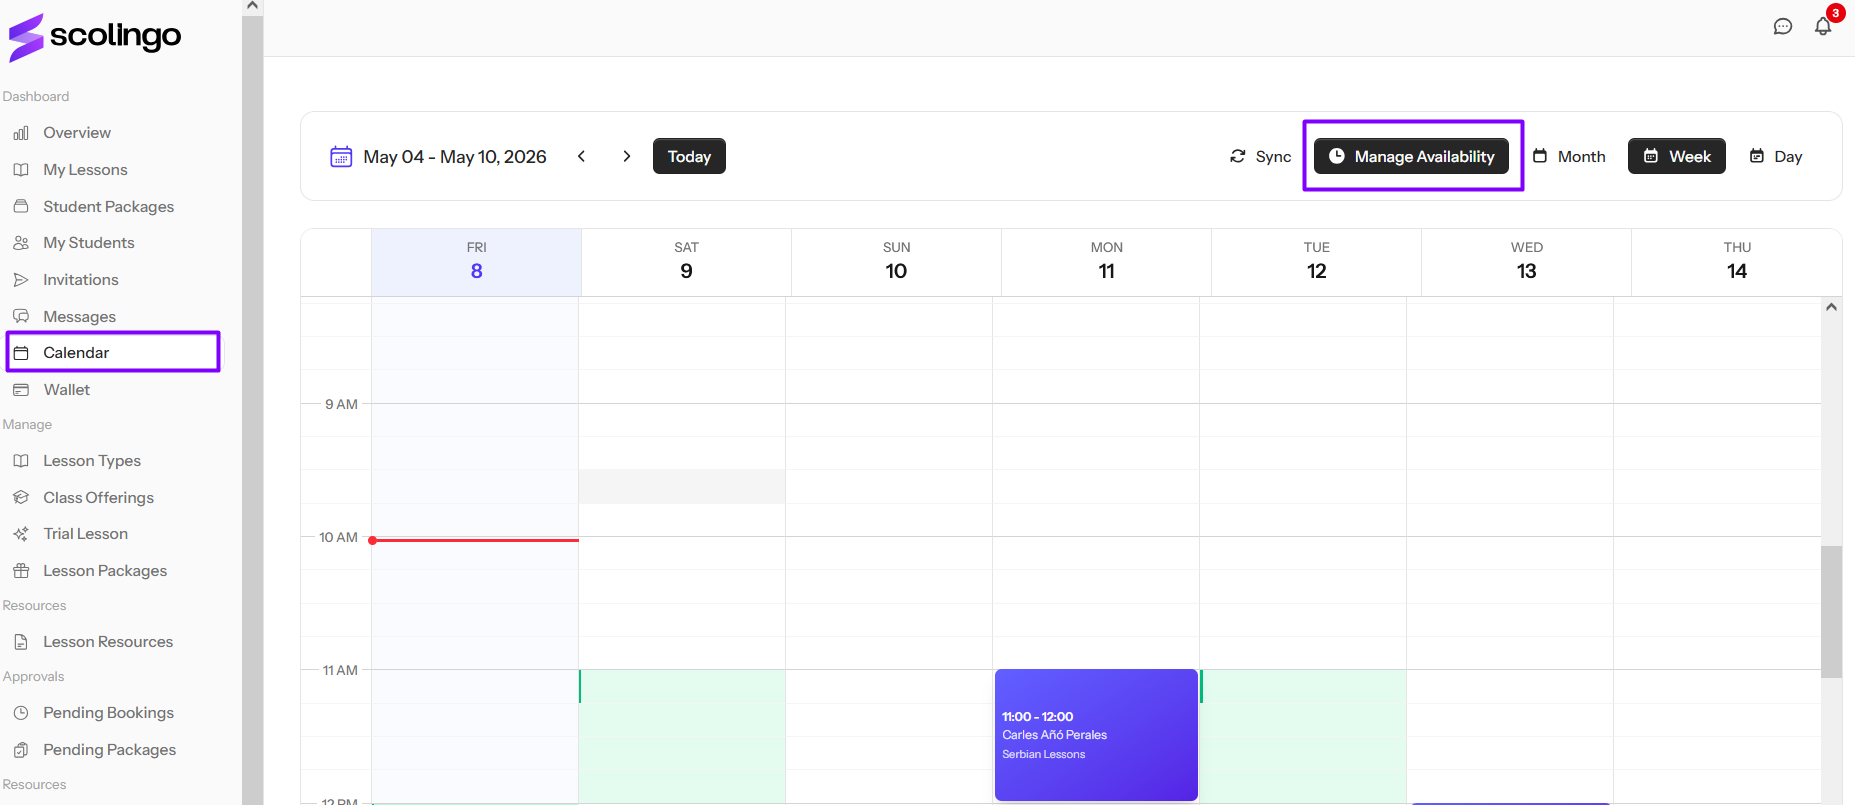
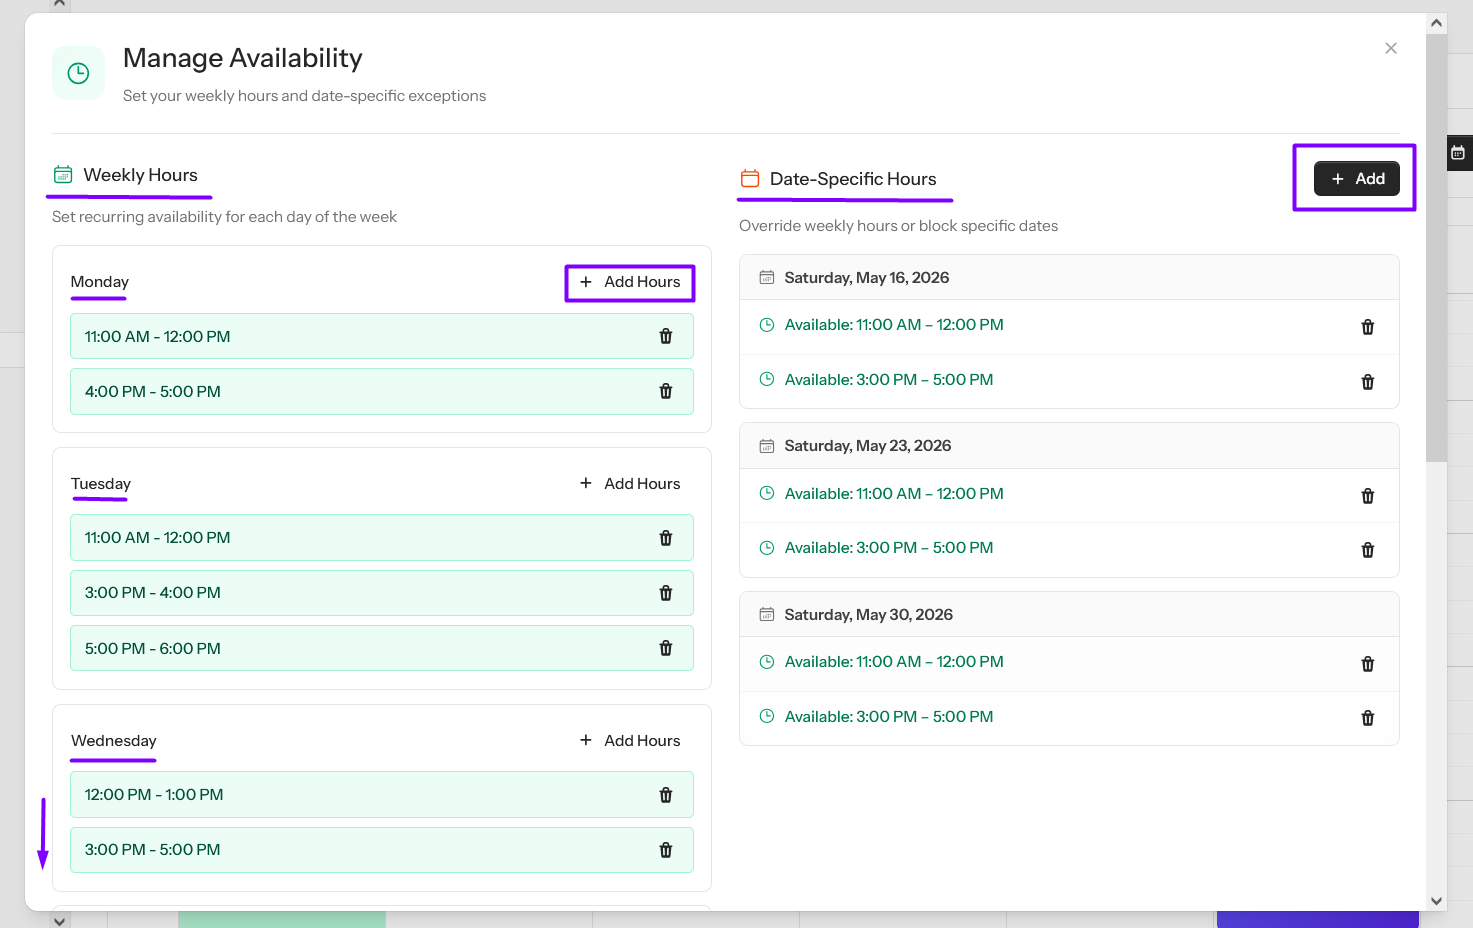
There are two settings: “Weekly Hours” and “Date-Specific Hours.”
• “Weekly Hours” allows you to set your regular availability for each day of the week.
• “Date-Specific Hours” lets you adjust availability for a particular date and override your regular weekly schedule when needed.
Setting Up the Wallet
You can access your “Wallet” from the main menu. Wallet access is protected for security reasons. We'll send a 6-digit code to your email address to verify your identity before granting wallet access.
Payments are processed through Payoneer – simply enter your Payoneer email address to connect your account.
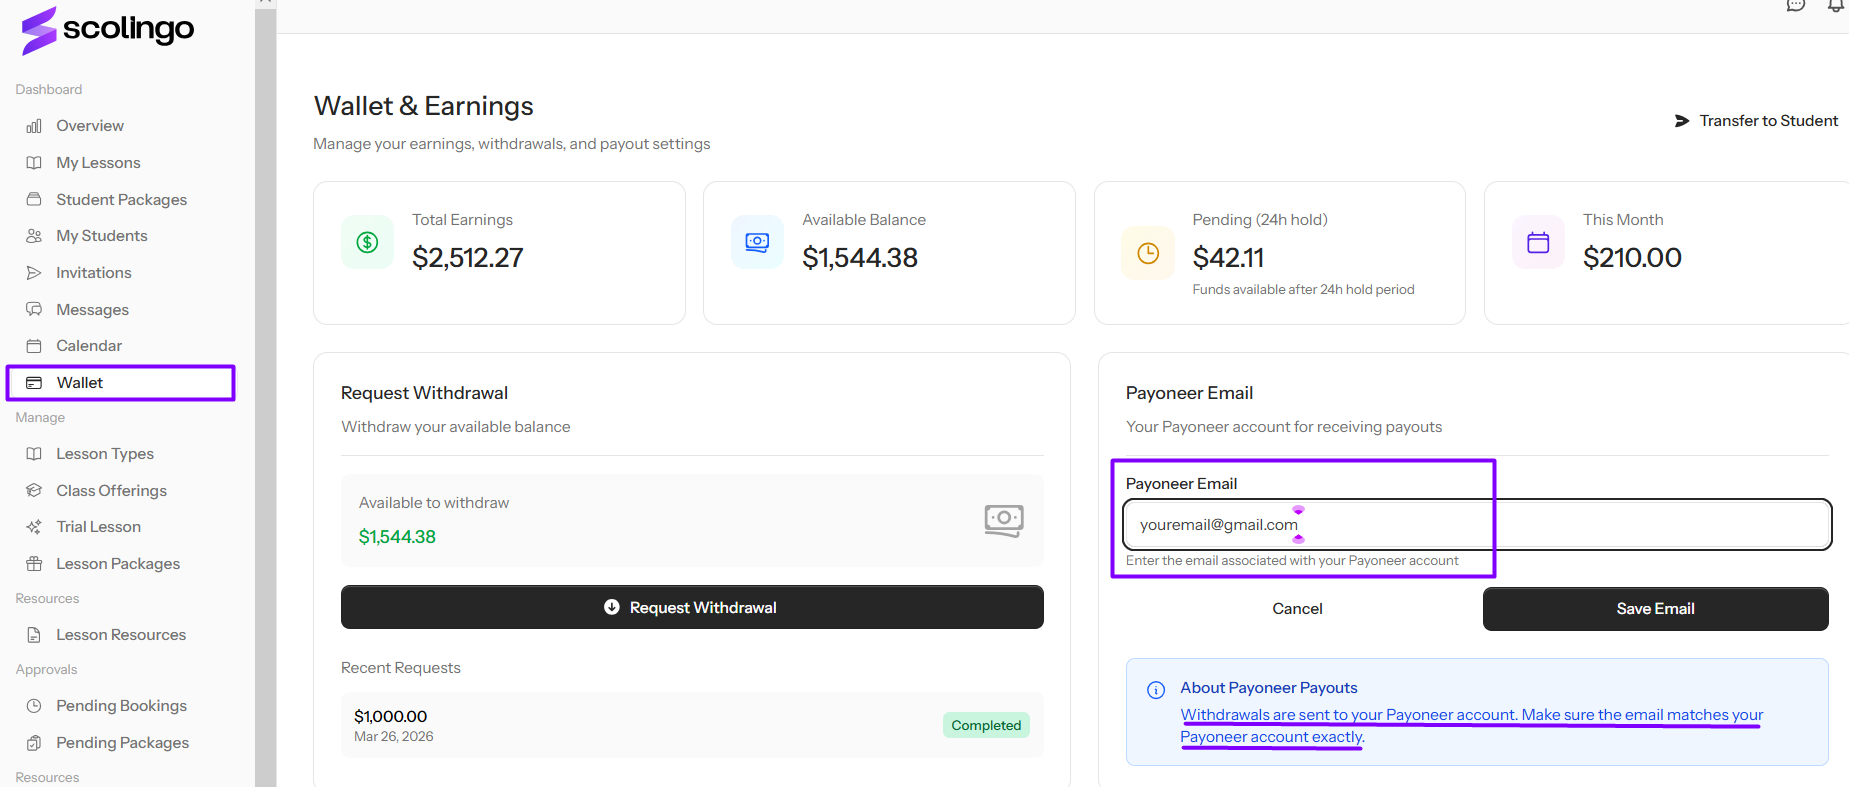
To withdraw your earnings, click “Request Withdrawal.”